An alternative Criteo Tag template for server-side GTM

One of the clients we work for at Adwise uses Criteo for some of their advertising. And just like all the other advertising vendors, Criteo has a tracking script to measure and report campaign performance. Not all advertising vendors also have a Tag template for Google server-side GTM though. So I was happily surprised that Criteo does. Unfortunately, that Tag template has some dangerous flaws that prompted me to (heavily) modify it.

In this blog post, I’ll explain what’s wrong with Criteo’s template and I’ll share my updated version.

[2023-03-10] Update: After having a conversation with Criteo, I learned that my original template was using a timestamp in local time instead of UTC. Unfortunately, this was not made clear in the documentation. As a result, I have updated my code to use a UNIX timestamp in seconds that is based on UTC.

The official Criteo Tag Template

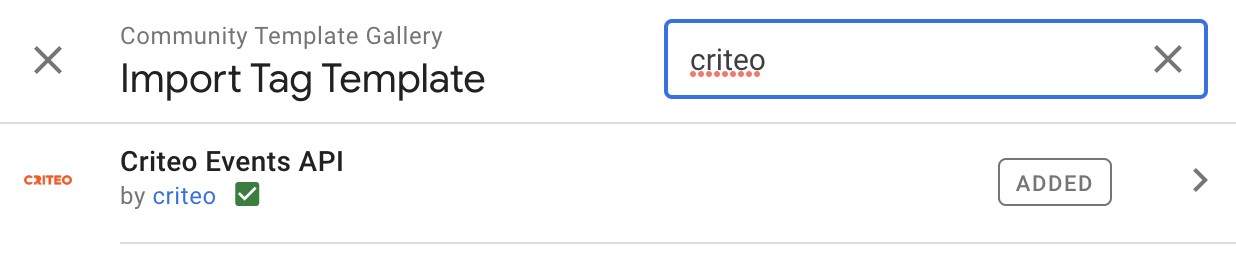
If you search in the Google Tag Template gallery, you’ll quickly find the official Criteo Tag template. The fact that it is in the official gallery gives it a bit of (false) credibility.

The Community Template Gallery

So you might be wondering what is wrong with the official Criteo template. Let me show you. The code in the screenshot below is from the official template:

A code snippet from the official Criteo Tag Template

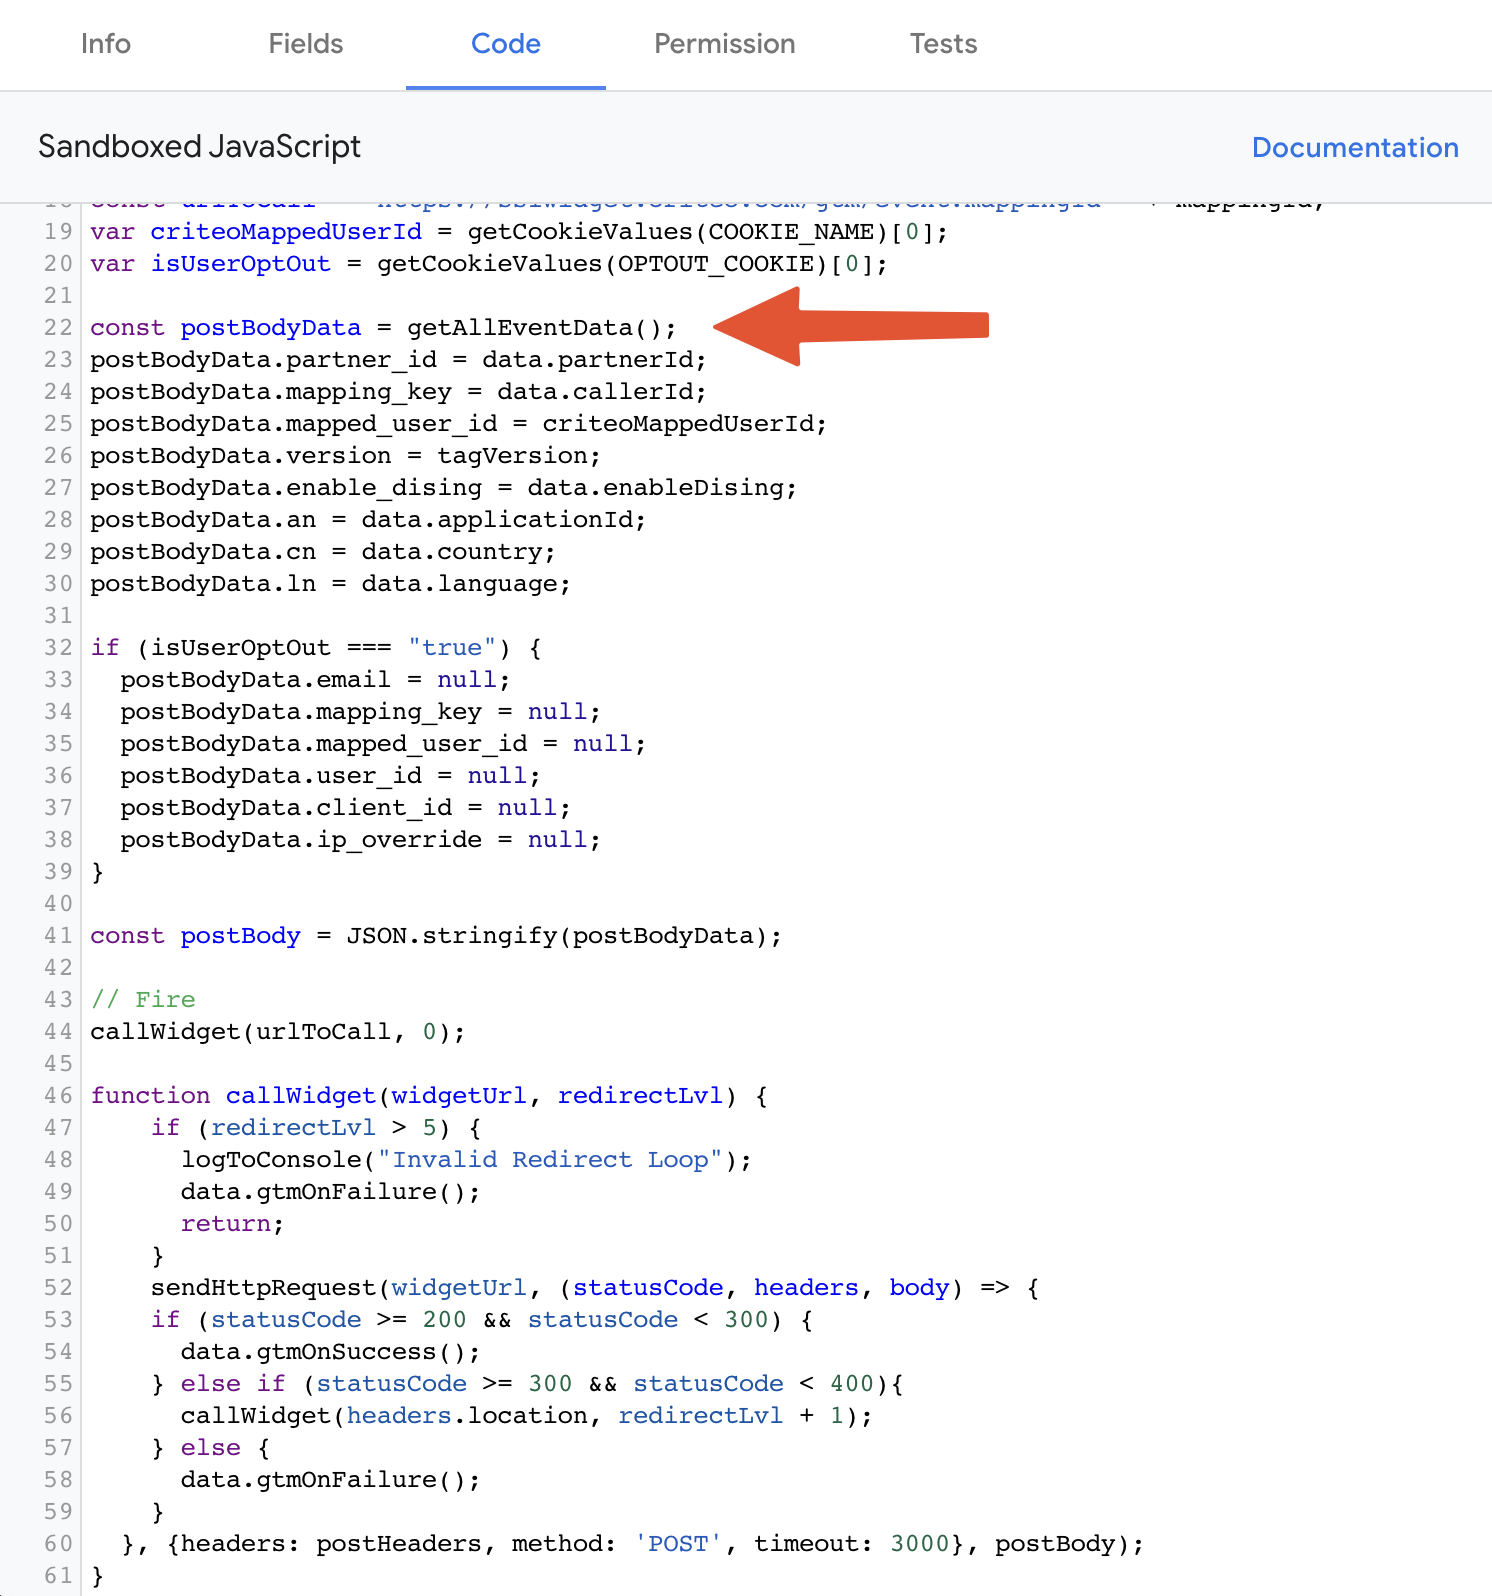
On line 22 they use the method getAllEventData() to get all the data from the Event Data Object and store it in the variable postBodyData.
Then on lines 32 to 39 they remove some data if the user has a specific cookie. This is the cookie ‘crto_is_user_optout’ (not visible in the screenshot). Note that this only works if you have a Criteo opt-out cookie. It does not work with your own Consent Management Platform, such as Cookiebot or OneTrust.
On line 41 the entire Event Data Object is stringified and eventually on line 44 the function is called that sends all the data to Criteo.

Because the official template uses getAllEventData() they will likely collect more data than needed. It's almost as if they want you to accidentally breach the GDPR…

Of course, you could be very strict by making sure that the Event Data Object only contains data that Criteo needs when the tag is fired. So I reached out to Criteo about this and asked them if they have any documentation about what data is expected in the Event Data Object. After a quite lengthy email conversation, this is the most helpful response I got:

In the case the customer wants to use the GTM S2S template we get all the details of the events from the default function getAllEventData … Once an event is triggered we get all the information from GTM.

They’re just repeating my point. Not helpful at all. Time for plan B!

My unofficial Criteo Tag Template

Criteo does have documentation about their server-to-server endpoint. (https://guides.criteotilt.com/onetag/s2s/) One interesting distinction between this documentation and the official template above is that the endpoint differs. Criteo’s template sends data to https://sslwidget.criteo.com/gtm/event?mappingId=..., while their documentation mentions https://widget.criteo.com/m/event?version=s2s_v0.

I heavily modded the official template to do three things:

  • Send data to the endpoint as described in the documentation.
  • Translate standard GA4 event names to Criteo event names. 
  • Only include the data that Criteo needs.

These standard GA4 event names are mapped to Criteo events:

page_view when page_location is /viewHome
page_view for all other pagesviewPage
view_item_listviewList
view_itemviewItem
add_to_cartaddToCart
view_cartviewBasket
begin_checkoutbeginCheckout
add_payment_infoaddPaymentInfo
purchasetrackTransaction
loginlogin

The new tag should be triggered on these events:

pageview|view_item_list|view_item|add_to_cart|view_cart|begin_checkout|add_payment_info|purchase|login

How to use this template

  1. Download the template.tpl from GitHub
  2. Create a new custom Tag template in your server-side Google Tag Manager container, and import the template.tpl file
  3. Add a new Tag using the template you just added and configure it correctly. You might need to reach out to your contact at Criteo to get all the necessary data, such as Application ID and caller ID.

Just as with the official template from Criteo, you’ll also need to add the “Criteo User Identification” Tag template to your web container. You can find this template in the Community Gallery for web containers.

How to block duplicate transactions with server-side GTM and Firestore

Duplicate transactions can be a big issue for clean and correct measurement in web analytics. There are several solutions to block duplicate transactions with Google Tag Manager, but most use cookies to store transaction ids that have already been sent. I wanted a pure server-side solution for this without the use of cookies. This article describes how I used server-side GTM and Cloud Firestore to do just this.

Google Firestore

Google Firestore is a database. Or more precisely, it is a serverless document database that uses NoSQL and it is very suitable for (near) real-time applications. That also makes it a perfect companion for server-side GTM.

It’s probably most convenient to create a new Firestore database under the same Google Cloud project as your server-side GTM container. Open Google Cloud by going to console.cloud.google.com and then select the project that contains your server-side GTM container. You can find Google Firestore by using the search bar on the top or by navigating to console.cloud.google.com/firestore.

Costs

Google Firestore is not free, unfortunately. But fortunately, there is a generous free tier that includes 50.000 read actions and 20.000 write actions per day. This means that your shop can have up to 20.000 transactions per day before this would cost any money. And if you have that many transactions, then the costs for Firestore will probably not be your biggest concern.

Upgrade to Firestore Native

When you go to the Firestore console for the first time you might see a notification that says: “This project uses another database service”. This means that your Google Cloud project is using the older Cloud Datastore service or that your project is running Firestore in Datastore mode. Either way, you should upgrade this to run Firestore in Native mode.

This project uses another database service notification

To upgrade Firestore to Native mode you can click the button and follow the steps.

Google server-side GTM

Server-side tagging means that you can run tags, such as the Google Analytics tag, in a server environment instead of in the client. This has several advantages such as improved website performance and better data security. We can use it to verify and clean data before it is forwarded to a vendor. And we can also use it to verify if the transaction we want to send to Google Analytics has been sent before.

The idea is to store every transaction ID in Cloud Firestore and only send transactions to vendors when the transaction ID is not found in our database.

Write to Firestore

The first step is to store the transaction ID of every transaction in Firestore. We need to write a custom Tag template for this that uses the Firestore.write function to write data to a Firestore document or collection.

Create a Tag template

You can create a new Tag template by navigating to the ‘Templates’ tab on the left-hand side in your server-side GTM container and clicking the ‘New’ button under Tag Templates. Here you can configure your new Tag, but you can also import my (or someone else’s) template as a starting point. To import a Tag Template, click the three dots in the top-right corner and click import. Download [this .tpl-file] and import it to GTM. And don’t forget to click the Save button after importing.

Create a Tag from a template

Now that we’ve created a new Tag Template, we can use it as a Tag. If you’re using my template, you’ll see that there are two fields to fill in. The first field is your Google Cloud project ID of the project which the Firestore database is under. The second field should point to a document path. You also need to add the same fields to Permissions tab in the template.

Create a Tag

After creating a Tag Template, we can use it to create a Tag with it. This Tag should be triggered every time a transaction takes place. If everything goes as planned you should see new entries appear in Firebase for every transaction now.

New entries in Firestore

Read from Firestore

There’s no need to create a custom template to read from Firestore because there’s a variable for this already available in every server-side GTM container. When you create a new variable in your server container, simply choose the ‘Firestore Lookup’ variable from the options.

In the variable settings, you should enter the same Collection Path as you’ve used in the Tag that you created earlier. Under that, you can enter your query conditions. In our case, we want to check if an incoming transaction_id has been registered in the database already. If the transaction_id is found, then the transaction should be blocked. And if it is not found, it can be forwarded.

The Firestore Lookup variable

Block duplicate transactions

Blocking a transaction is now a matter of adding a blocking trigger to the tags. The blocking trigger should trigger on every event where the value of the variable that reads from Firestore is not undefined. Or in other words: the blocking trigger should fire if the transaction_id was found in the Firestore database.

The blocking trigger

How to Integrate First-party Data with Server-side Google Tag Manager

Lately, I’ve been experimenting with Server Side Google Tag Manager (SSGTM). There are several advantages of using a server-side implementation over regular GTM, but one of them is integrating first-party data. Instead of just sending the data collected by a tracker (such as gtag.js) directly to a vendor (such as Google Analytics), you could manipulate the payload first. Imagine substituting transaction revenue with profit, or including a customer lifetime value.

But how do you integrate data from an external source with Server Side GTM? Let’s find out!

Integrating an external source

To integrate data from an external source, we need an external source with data. (Duh!) Let’s start with something not too complicated, like integrating weather data from openweathermap.org. After subscribing (for free), we can generate an API key. With that API key, we can then make GET requests. The URL below, for example, returns a JSON object with the current weather in my hometown.

https://api.openweathermap.org/data/2.5/weather?lat=52.3746027&lon=6.6810724&appid=[enter_api_key_here]&units=metric&lang=en

Of course, there are more useful things that we can do with server-side GTM, but this will serve as an example.

Requesting data from the server container

Now that we have a URL that returns some weather data, we can look at how to call this URL from a server-side GTM container. In a regular GTM container, we can use a custom JavaScript variable or a custom HTML tag to execute custom code. However, if we want to execute custom code in a server container we need to write a custom template. I must admit that I found this quite daunting at first, but it was easier than expected.

Custom templates

Use the menu on the left in your server container to navigate to the ‘Templates’ page. On this page, you can do two things. You can import templates from other users through the Community Template Gallery or by importing a .tpl-file. And you can also create custom templates from scratch. When you click on one of the three ‘New’ buttons, you enter the Template Editor. This is where you can enter your code.

Find the Template Editor here

Custom templates use Sandboxed JavaScript and are based on ECMAScript 5.1. “Sandboxed JavaScript is a simplified subset of the JavaScript language that provides a safe way to execute arbitrary JavaScript logic from Google Tag Manager’s custom templates.” (source) The ECMAScript 5.1 code looks a bit different compared to what we’re used to from regular GTM containers. To me, it looks a lot like Node.js. Google’s documentation about the available APIs can be found here: https://developers.google.com/tag-platform/tag-manager/server-side/api

My first attempt: a Variable Template

Based on my experience with regular GTM, I started building a variable template. This way, we could use the available Tags in the server container and simply add our custom variable to insert the external data. The code I used looks like this:

Unfortunately, when I add this variable to a Tag, I get this message: "Variable tried to use an asynchronous API." The Tag has fired but doesn’t wait for our variable to finish the request. The code above doesn’t work! So it looks like asynchronous APIs can’t be used in variables. I checked if we can make synchronous GET or POST requests from a server container, but didn’t find a way to do so.

So my conclusion is: a variable template does not work for our purpose here.

Update (April 2022): shortly after publishing my blog Google released an update that makes it possible to use asynchronous variables in server-side GTM. You can read about it on Simo Ahava’s blog.

Building a Tag Template

If a variable doesn’t work, let’s try a tag! Using a tag means that we won’t hook directly into another tag that might already be added to the container. I was hoping to integrate with a Google Analytics tag for example. Luckily for us, Google provided the sendEventToGoogleAnalytics API function to send data to Analytics. We’ll get to that later. Let’s look at making requests first.

sendHttpRequest and sendHttpGet

Google provided two APIs to make HTTP requests. You can make GET requests with sendHttpGet or you can make GET or POST requests with sendHttpRequest. The latter is more flexible, but requires a bit more code. This is the same asynchronous API that we used with the variable example earlier, but fortunately, asynchronous APIs can be used in tags!

The code below uses sendHttpRequest to make a request. It uses JSON.parse to parse the response, so we can use it further.

Permissions

If we would try the code above now, we would get an error. That’s because we need to give our tag template permission to send HTTP requests first. We can either allow the tag to send requests to any URL or to just one specific URL. In the screenshot below you also see that I added permission to read event data, which we’ll need later.

Permissions can be set on the Permissions tab

sendEventToGoogleAnalytics

The sendEventToGoogleAnalytics API is an easy way to send data to Google Analytics. You could of course also make another HTTP request to the Measurement Protocol, but the sendEventToGoogleAnalytics API makes this a bit easier.

Google Analytics 4 (GA4)

The Event Data sendEventToGoogleAnalytics requires input in the Unified Schema format. The Event Data object in the server-side container should have this format. Unfortunately, I couldn’t find any official documentation about this Unified Schema. But if you use a GA4 tag on the client-side to send data to the server-side container, then the Event Data object contains everything needed to send data to GA4. The Event Data object can be accessed with the getAllEventData API.

The code below is a very basic snippet to pass data to GA4:

We only need to add the extra data from the sendHttpRequest response. We can simply add an extra key and value to this object and pass it to sendEventToGoogleAnalytics.

Universal Analytics

So what should this Unified Schema look like to send data to Universal Analytics with the sendEventToGoogleAnalytics API? Good question! After some searching, I found this page: https://community.stape.io/t/using-sendeventtogoogleanalytics/120/4
We can build an object that uses Measurement Protocol parameters for the most part, except for the UA property ID. Instead of ‘tid’, we must use ‘x-ga-measurement_id’.

To get the client id, which is also a required field for a Universal Analytics request, we can use getEventData('client_id'); to reuse the client id from GA4.

Putting it all together

By the way, it is also possible to send the data to both GA4 and UA from the same tag. When we combine the examples from above, we get this code:

And that it! We’ve successfully retrieved data from the OpenWeatherMap API and used that data to manipulate the data that is sent to Google Analytics, both Universal Analytics and GA4. This is a very simple and unpracticle example of course, but I hope it will help you get started with more practical real-life projects.

Adding Instant.page to Google Tag Manager

One of my colleagues at Adwise recently told me about Instant.page. By adding a small code snippet to your HTML, you get just in time preloading to decrease latency. It’s really easy to implement and free to use!

Of course we could manually add this code snipped to the page, but since we use Google Tag Manager for most of our clients we thought it would be even quicker and easier if we could just add the code snippet to a Custom HTML Tag in GTM. However, if we add the snippet and try to publish the container we get an error…

Tag Manager error

Luckily, there’s a blog post by Simo Ahava for almost every Google Tag Manager issue you can think of and this is no exception. About a year ago Simo wrote a blogpost about adding HTML Elements to the page programmatically and it introduces a workaround for the error message we got. Using his instructions, I rewrote the Instant.page snippet so it can be added to the page through a Custom HTML Tag. It looks like this:

It can then be added to Google Tag Manager like this:

Add the rewritten snippet to a Custom HTML Tag.

And the resulting rendered HTML looks like this (you might have to click the image to zoom in a bit):

rendered HTML
The resulting HTML.