Why I wrote this blog
One of the exciting new opportunities that GA4 brings over Universal Analytics is the export to Google BigQuery with free GA4 properties. It will undoubtedly cause a huge increase in the usage of Google BigQuery by marketers.
However, working with GA4 data in BigQuery also has some challenges. One of these challenges is that the timing of the daily export is pretty random. Another challenge is that when a project gets bigger, it gets increasingly difficult to keep the project (cost) efficient, well-organized, and maintainable.
Luckily for us, both challenges have solutions. We can build a small pipeline that executes precisely when a new export to GA4 happens, regardless of the timing, for example. And tools like dbt and Dataform are perfect for managing growing BigQuery projects.
Taneli Salonen wrote an excellent blog about triggering Dataform queries immediately after the GA4 BigQuery export happens. My blog builds on his work. Please read his blog before continuing with my small addition.
I feel one small but very useful thing is missing in Taneli’s tutorial though. We can trigger Dataform when a table is added to BigQuery, but I also want to know what table is added by GA4!
This is important because if you want to build an efficient project in Dataform, you’ll want to build incremental tables, based on only the new data from the latest export. It’s often not necessary to reprocess all previous days again.
There are other blogs about this challenge. Simo Ahava (who else) wrote a blog that explains how to run a scheduled query with the latest ‘table_id’. His solution uses a Cloud Function that extracts the tableId from the BigQuery logs. He’s not using Dataform though. And Artem Korneev from gtm-gear.com wrote an elaborate three-part blog series about triggering Dataform, including a passage about extracting the tableId from the logs.
In this blog, I want to combine Taneli’s instructions with learnings from Artem’s blog series. I’ll explain how you can run Dataform queries immediately after the GA4 BigQuery export to build incremental tables based on the latest addition to the GA4 dataset.
Set up Cloud Logging, PubSub, and Workflows
Of course, I could rewrite Taneli’s blog, but that feels a bit redundant. His tutorial is excellent, so I’d recommend heading over to his website and following the instructions there.
We’ll need to do one thing differently compared to his instructions. Instead of the Workflow definition by Taleni, we’ll use this one instead: (continue reading to the end for an even better version)
As you can see, I’ve added a couple of lines. I’m taking the content of the log sink, decoding it, extracting the tableId, and adding it to a variable called GA4_TABLE.
Now we can move over to Dataform and see how we can use this variable in our project.
Build incremental tables in Dataform
This part of my blog builds on Artem’s blog series on Dataform. Scattered across the three articles he explains how to run Dataform incrementally or do a full refresh. Building tables incrementally means that new rows are added to an existing table instead of replacing the entire table. This is a lot more efficient compared to reloading all the data each time.
The trick here is to use the latest daily table for an incremental run, but use the entire table for a full refresh. By combining all the instructions we can do just that!
Add a variable to dataform.json
In your dataform.json file, add the “GA4_TABLE” variable and give it a default value “events_*”. This will add a projectConfig variable to your Dataform project.
”Add the projectConfig variable to your table declaration
A best practice for organizing a Dataform project is to define your source data with declarations. In our case, this will be the GA4 data in BigQuery. In the declaration, we’ll add the database and dataset from the GA4 data, but instead of adding the table ID directly, we’ll add the variable from our dataform.json file.
How to use the projectConfig variable in a SQL query in Dataform
To use the projectConfig variable in a SQL query in Dataform, you can reference it using the following syntax: dataform.projectConfig.vars.VARIABLE_NAME. In this case, we want to use the GA4_TABLE variable to build incremental tables based on the latest addition to the GA4 dataset.
In Dataform, you have the flexibility to choose between two approaches when updating your datasets: incremental and full refresh. With incremental updates, only the latest changes are added to existing tables. We can use the command ${ when (incremental(), ...} for an incremental update and ${ when (!incremental(), ...} for a full refresh. These commands are like little guides that tell Dataform what SQL magic to perform, depending on whether you want to add data from the latest daily table (think events_20230901) or replace all the data for a full refresh (e.g. events_*). Dataform will automatically adjust the SQL accordingly.
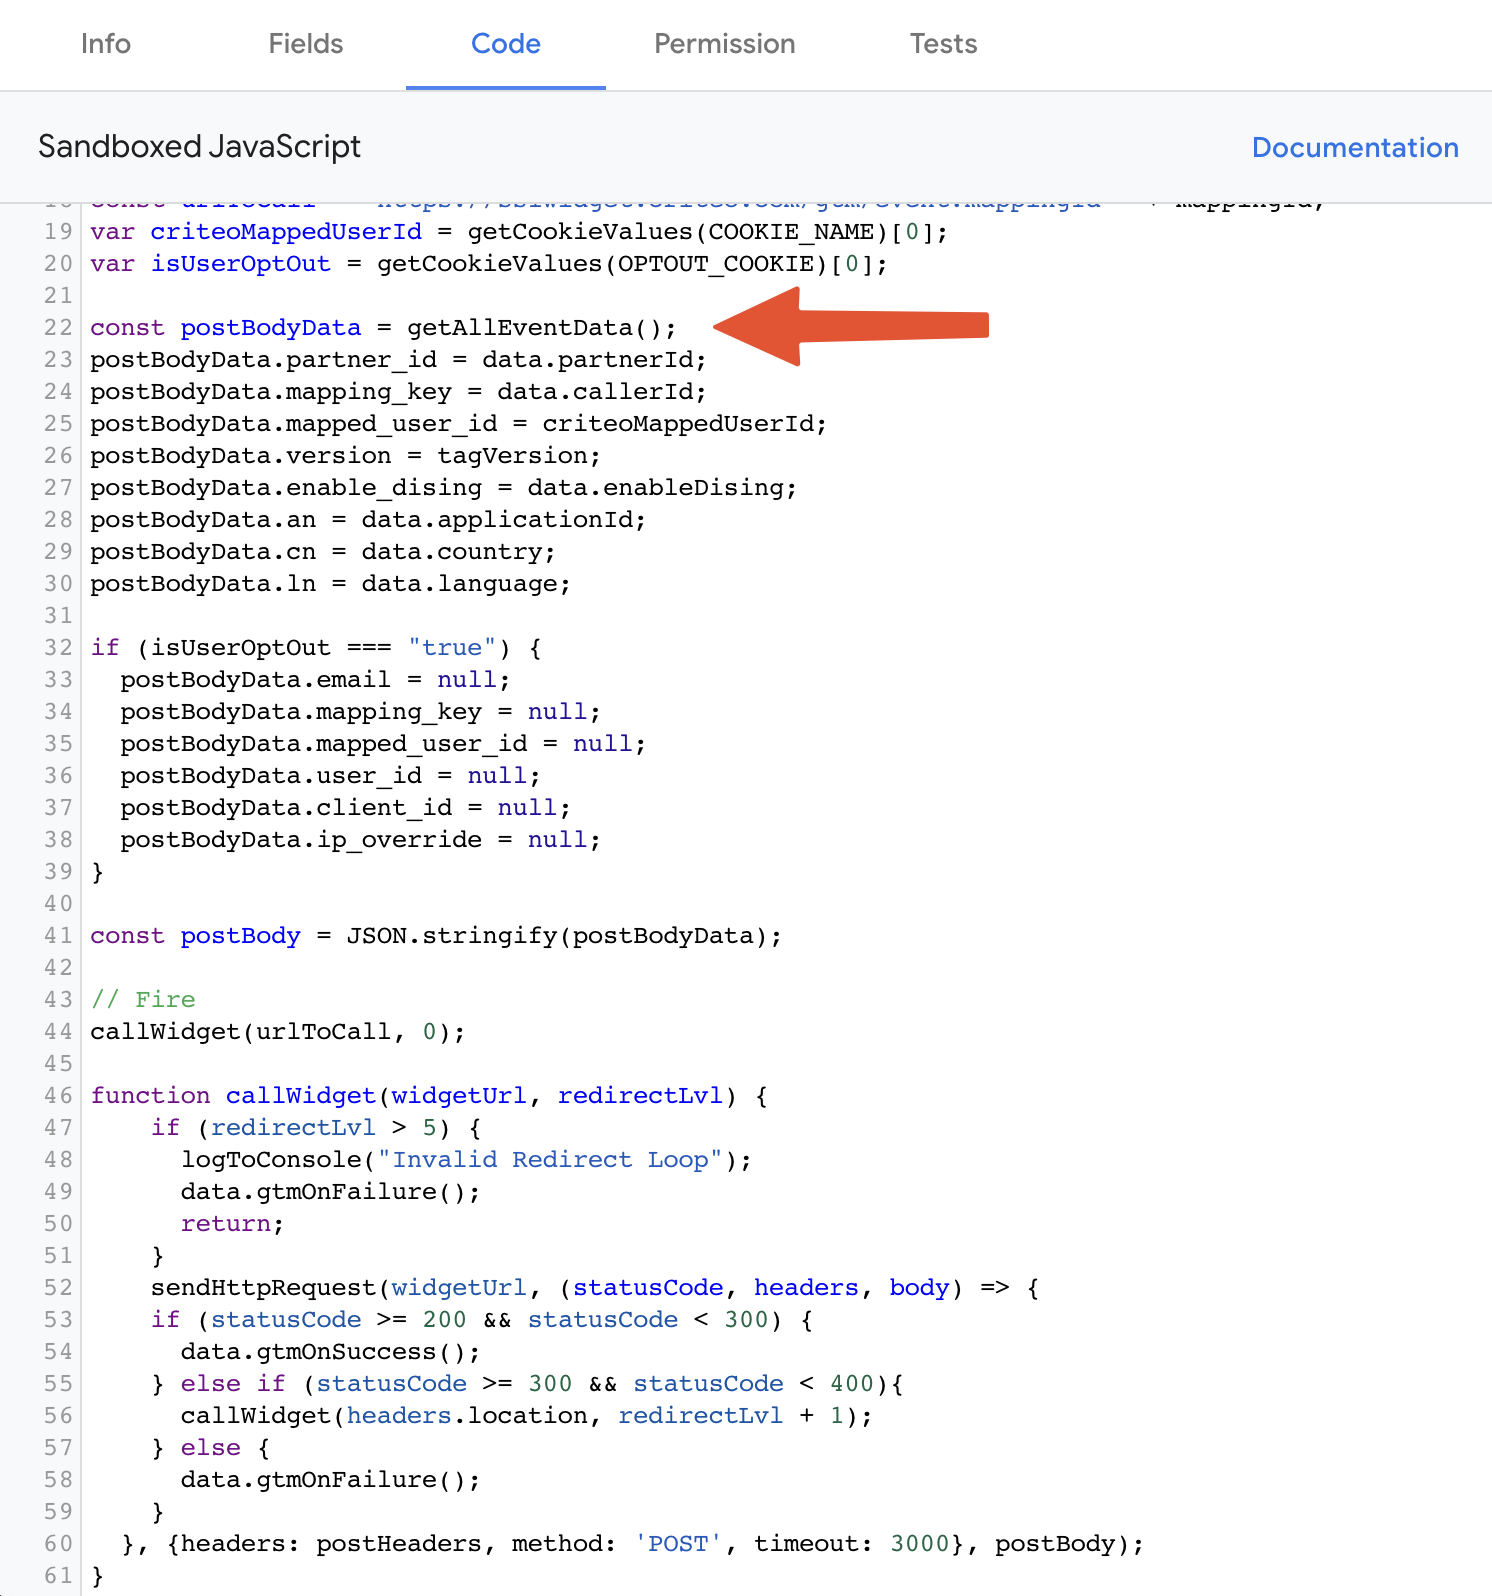
Here’s an example SQL query for Dataform that calculates the number of sessions per day, demonstrating how to incorporate the projectConfig variable:
The important part is in lines 15 to 17. In the query above, the ${ when (incremental(), ref(dataform.projectConfig.vars.GA4_TABLE))} expression ensures that when running an incremental build, Dataform will use the table specified by the GA4_TABLE variable. On the other hand, when performing a full refresh, the query falls back to using the entire GA4 dataset.
Dataform’s ability to build tables incrementally is a powerful feature. By adding only one day of data at a time, you can efficiently update your tables without the need to reprocess all previous days. This not only saves processing time but also helps to keep your project cost-efficient and maintainable.
Downsides
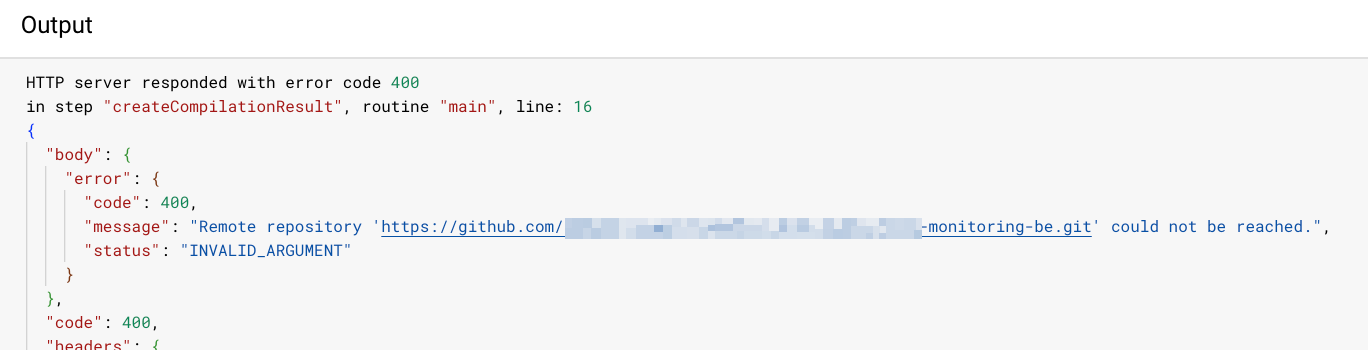
The major downside of this approach is that it is critical for the Workflow to succeed in order to build a complete table. If the Workflow fails, we’ll have a gap in our data. Unfortunately, I’ve noticed that this Workflow can actually fail quite often if it fails to connect to a connected GitHub repository. (See the screenshot below.)
A possible workaround for this is to add “retry steps” to the Workflow that will execute a step again if it fails. After adding this to the Workflow above, we get the following Workflow:
This is the Workflow I’m currently using.
Wrap up
In conclusion, leveraging Dataform’s incremental build capabilities enables you to efficiently manage your BigQuery projects by adding new data incrementally, optimizing costs, and maintaining a well-organized project structure. By incorporating the projectConfig variable in your SQL queries, you can dynamically reference the latest daily table, ensuring that your incremental builds are always up to date.