

Google recently released its Device Access API. This article is a short explanation of how to access and use this API to control a Google Nest thermostat.
We moved to a new house a few months ago and the previous owners left their thermostat behind. This thermostat turned out to be a brand new Nest smart thermostat. Of course, I wanted to connect this smart device to my home automation. But unfortunately, after some searching, I found out that most connections were deprecated after Google acquired Nest a couple of years ago, along with the API access for consumers. The only option was to sign up for a waitlist.
But to my surprise, I got an email from Google a couple of weeks ago! The Device Access Console is now available to individual consumers as well as commercial partners. I wanted to find out if I could control my Google Nest thermostat so I wrote some Python code for this.

Get started with Google documentation
Google has written some quite elaborate documentation about all the steps needed to access the API. The purpose of this article is not to rewrite their help articles. These articles will get you started:
- https://developers.google.com/nest/device-access/registration
- https://developers.google.com/nest/device-access/get-started
- https://developers.google.com/nest/device-access/authorize
- https://developers.google.com/nest/device-access/use-the-api
- https://developers.google.com/nest/device-access/api/thermostat
And you’ll also need these links:
How much does it cost?
Before creating your first project, you must pay a one-time, non-refundable fee (US$5) per account. There can also be cost involved by using Google Cloud services, but I have been polling my thermostat every 5 minutes for a couple of weeks now without cost.
Gather all requirements
It’s tempting to begin creating a Device Access project right away (I did so too), but I found out that it is probably easier to get all the necessary prerequisites first. Before you can start coding you should follow these steps:
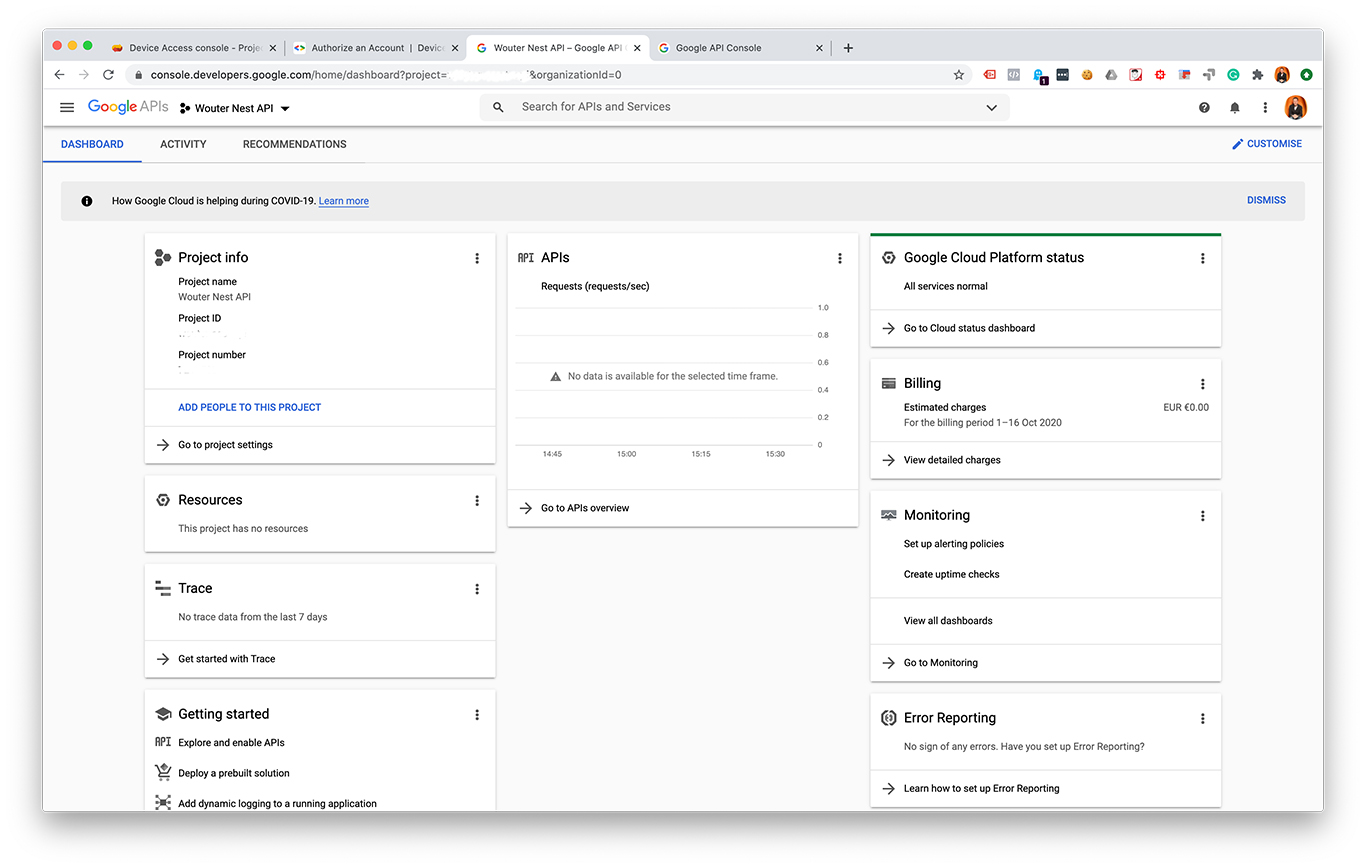
- Create a Google Cloud Console project at console.cloud.google.com
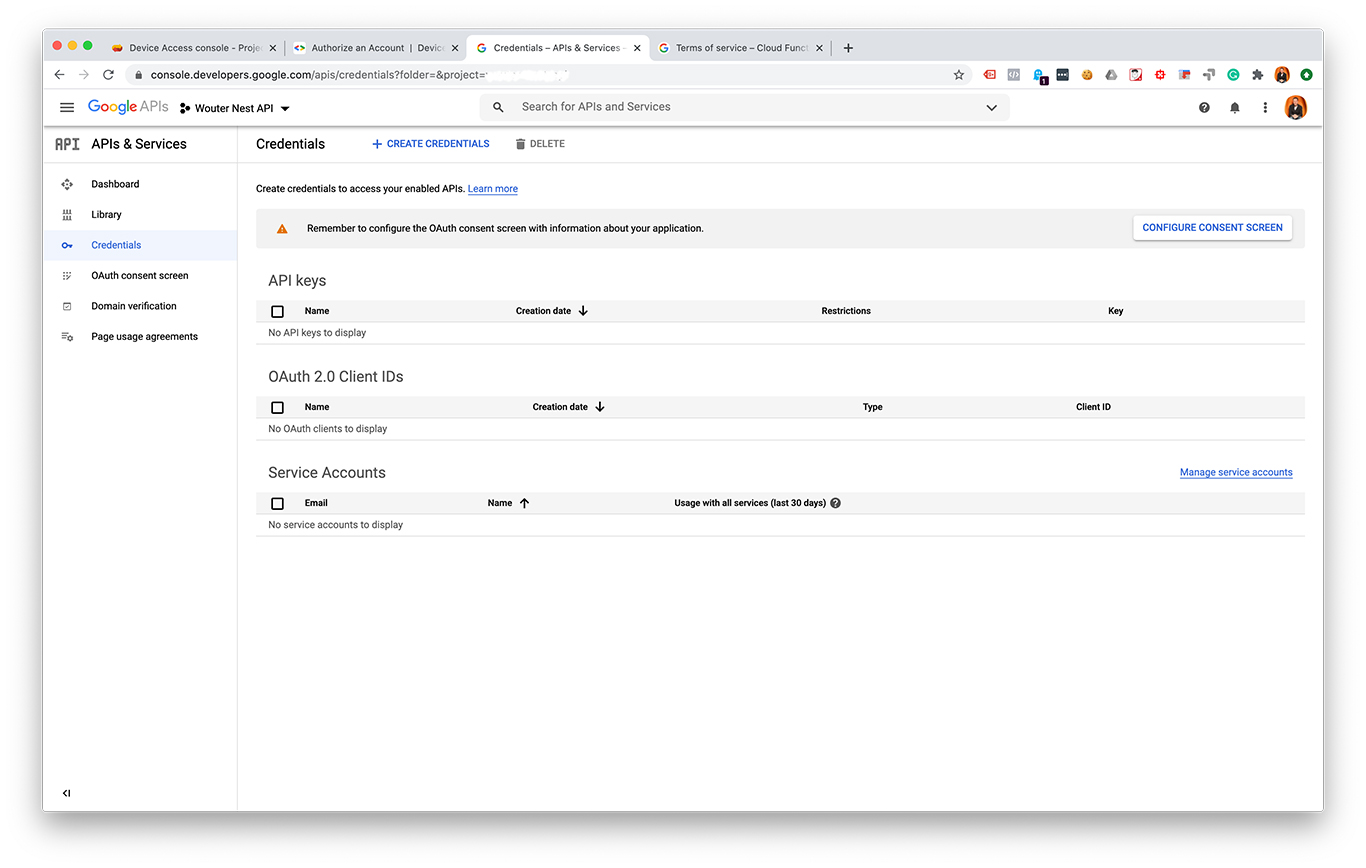
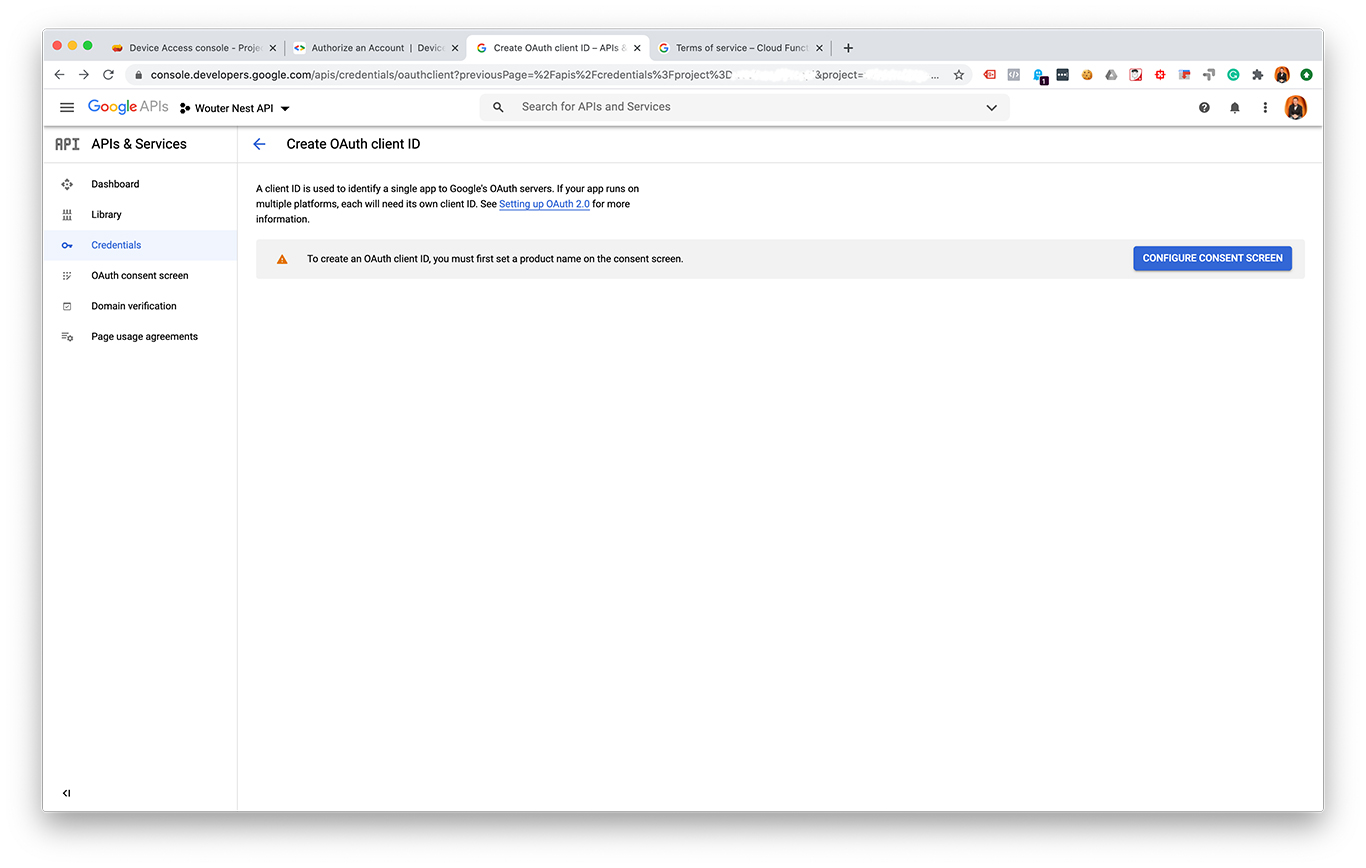
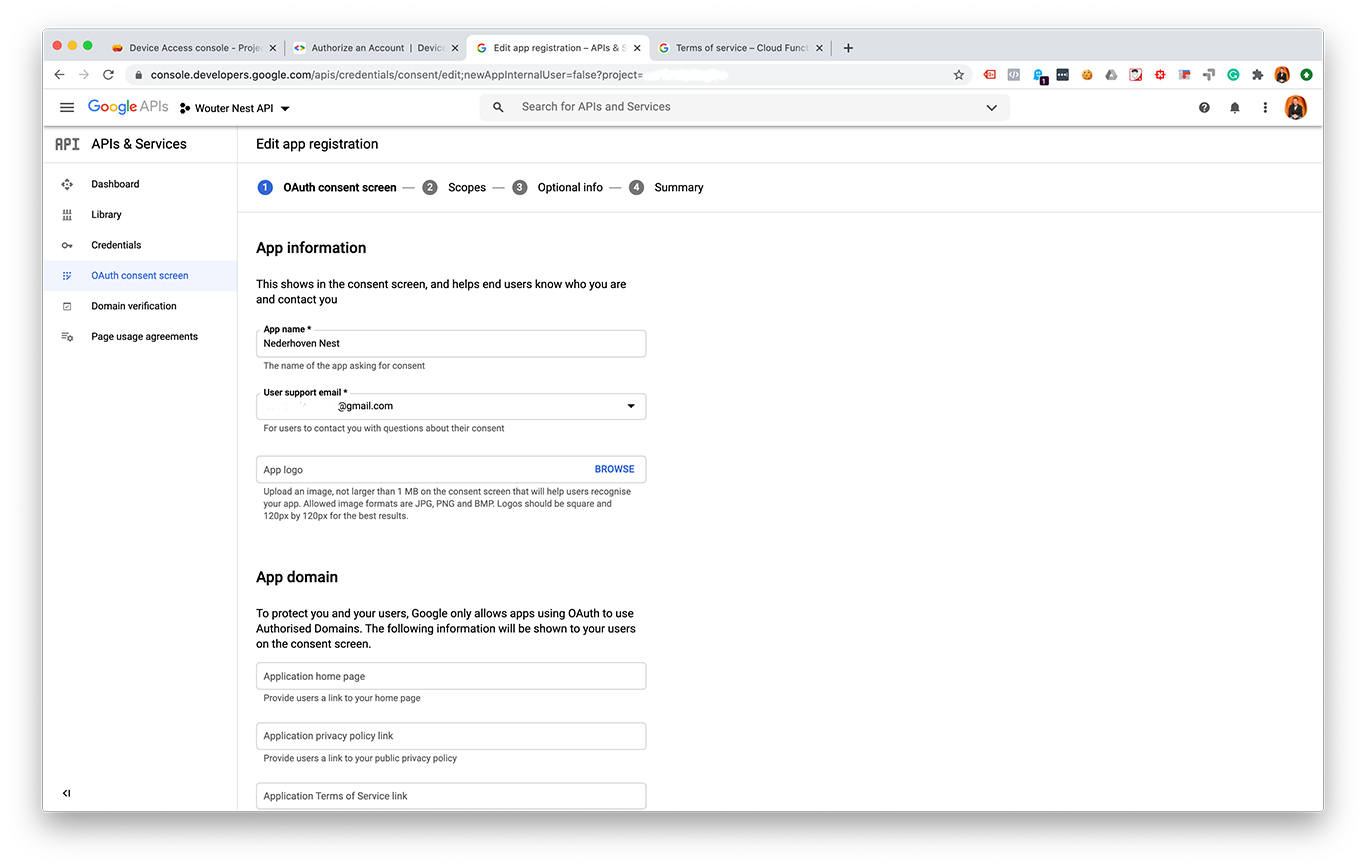
- Create Cloud Console oAuth 2.0 credentials
- Set a redirect URI
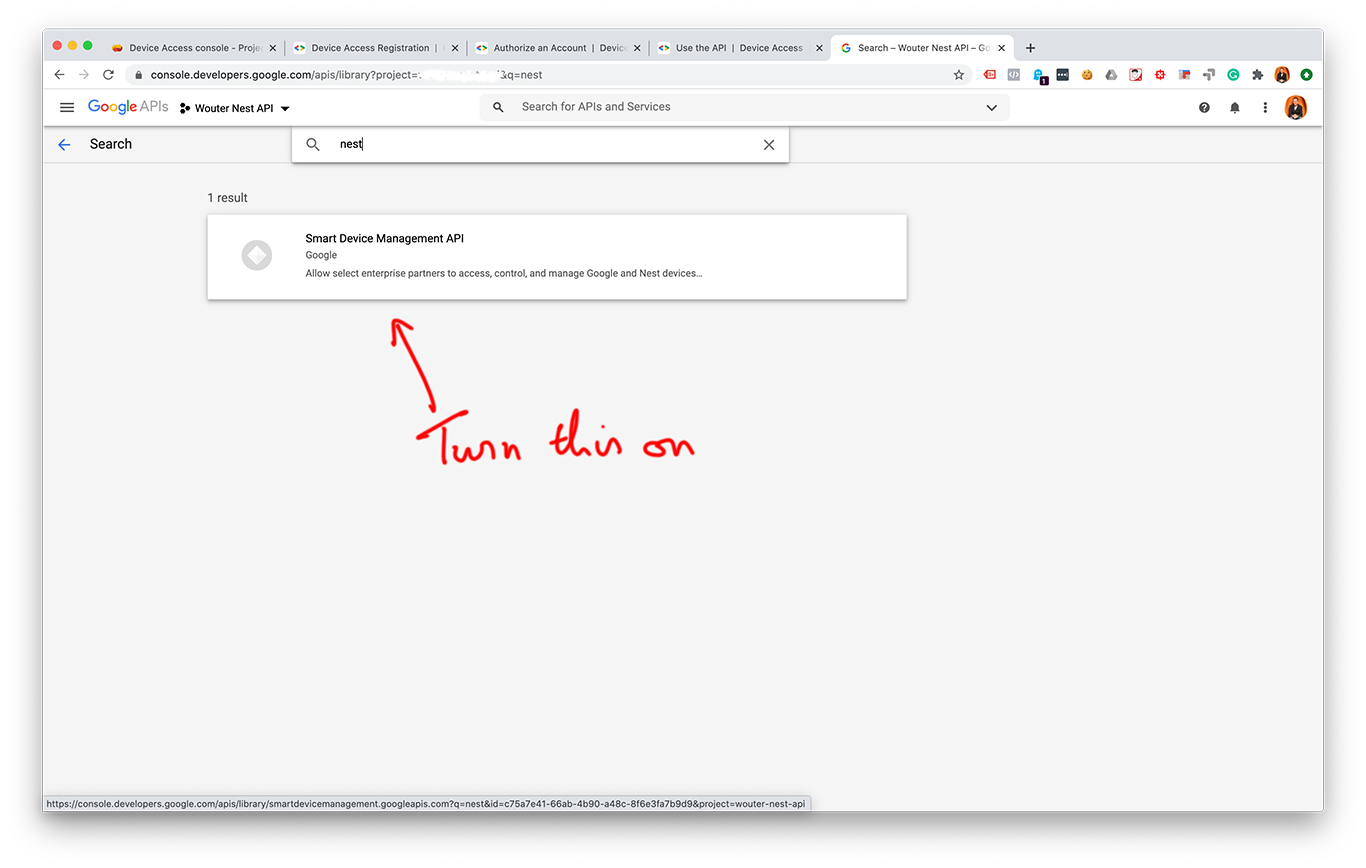
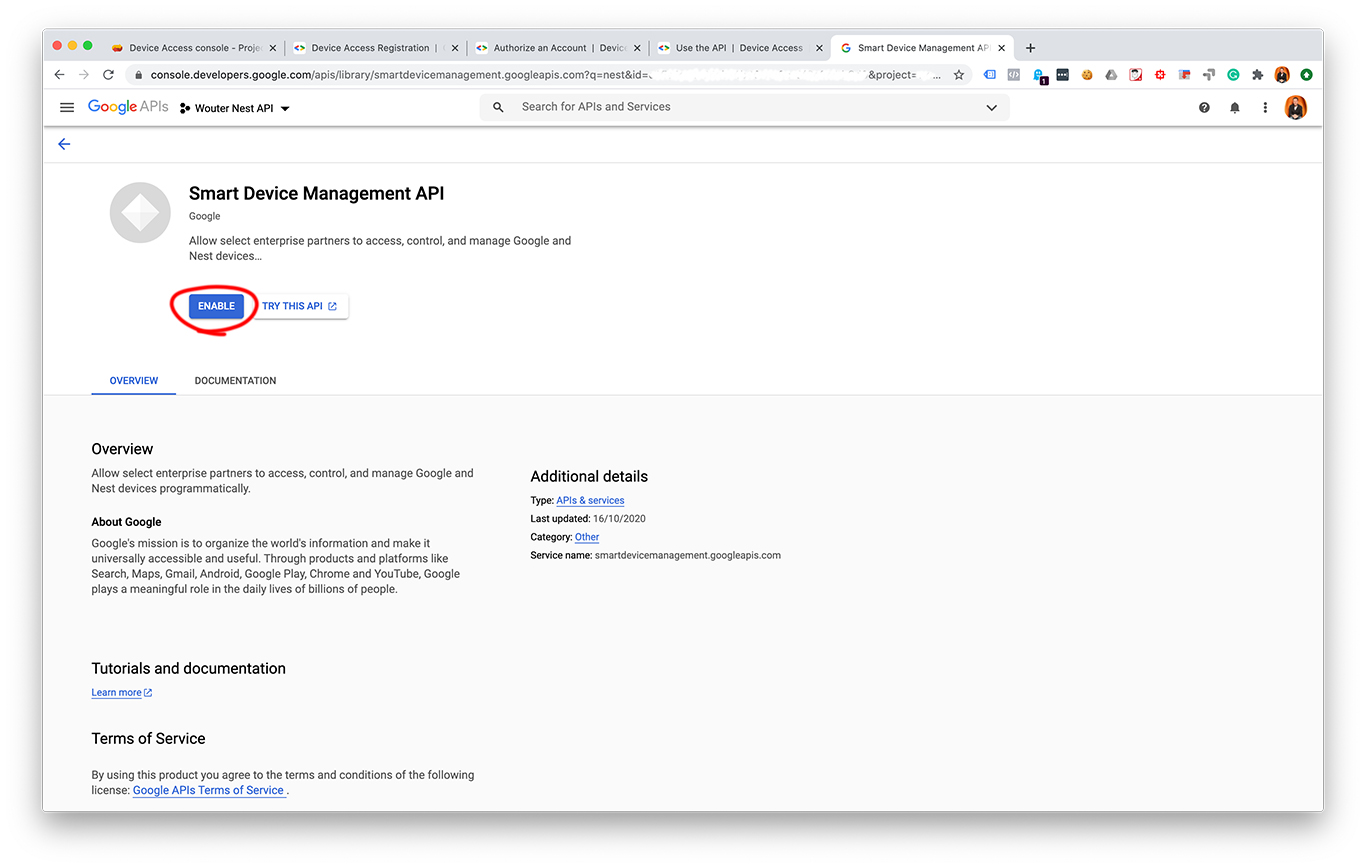
- Turn on the Smart Device Access API
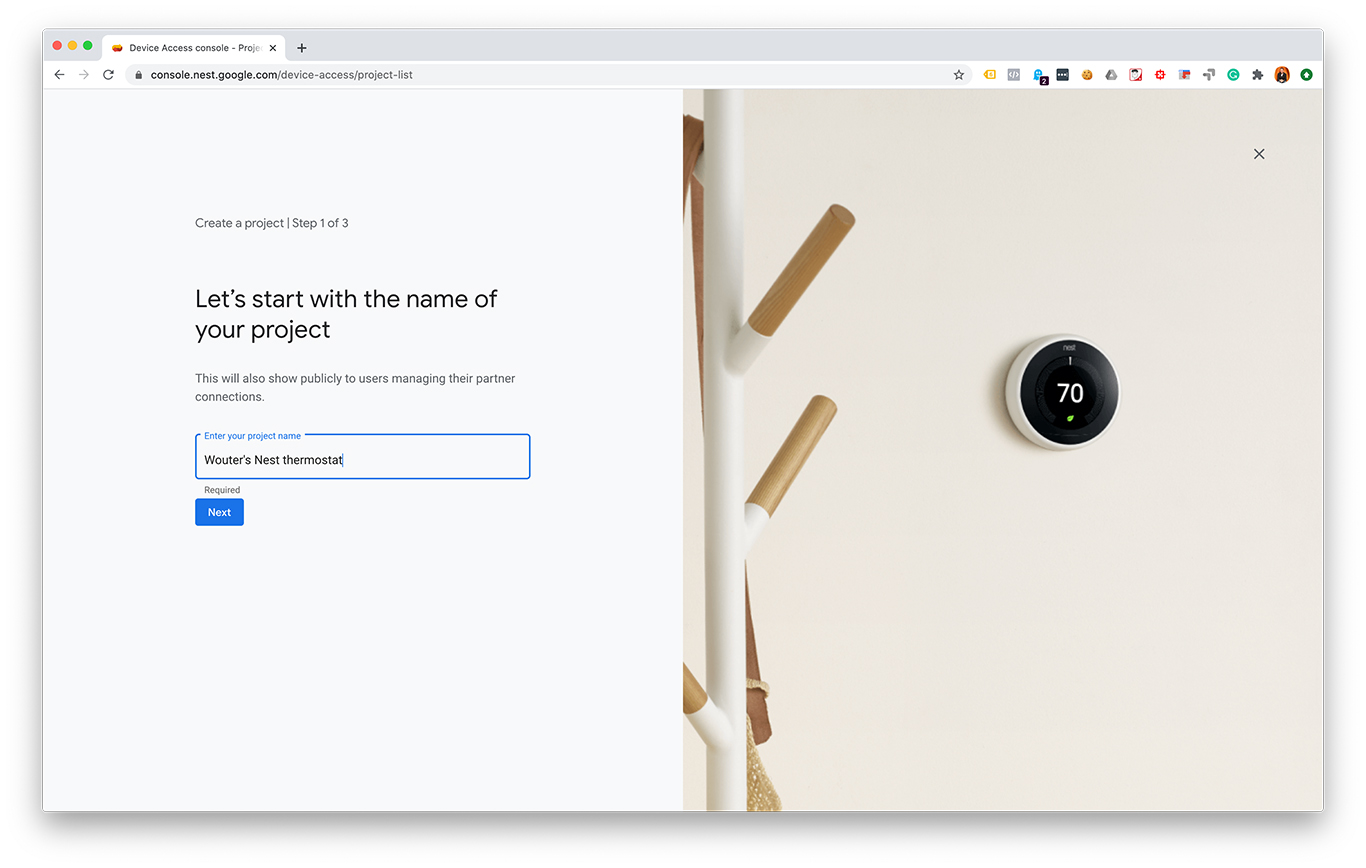
- Create a Device Access project at console.nest.google.com
I made some screenshots from each step:
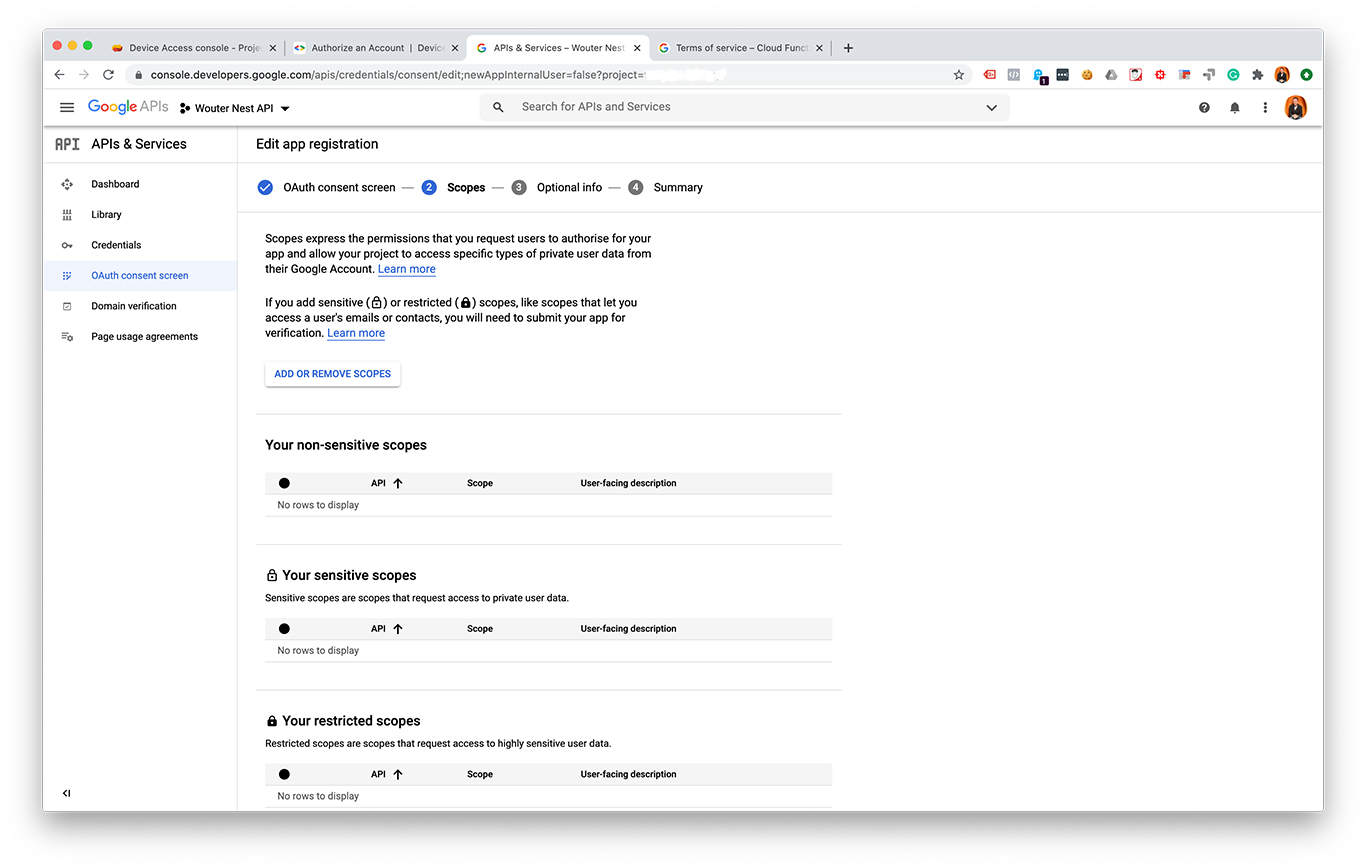
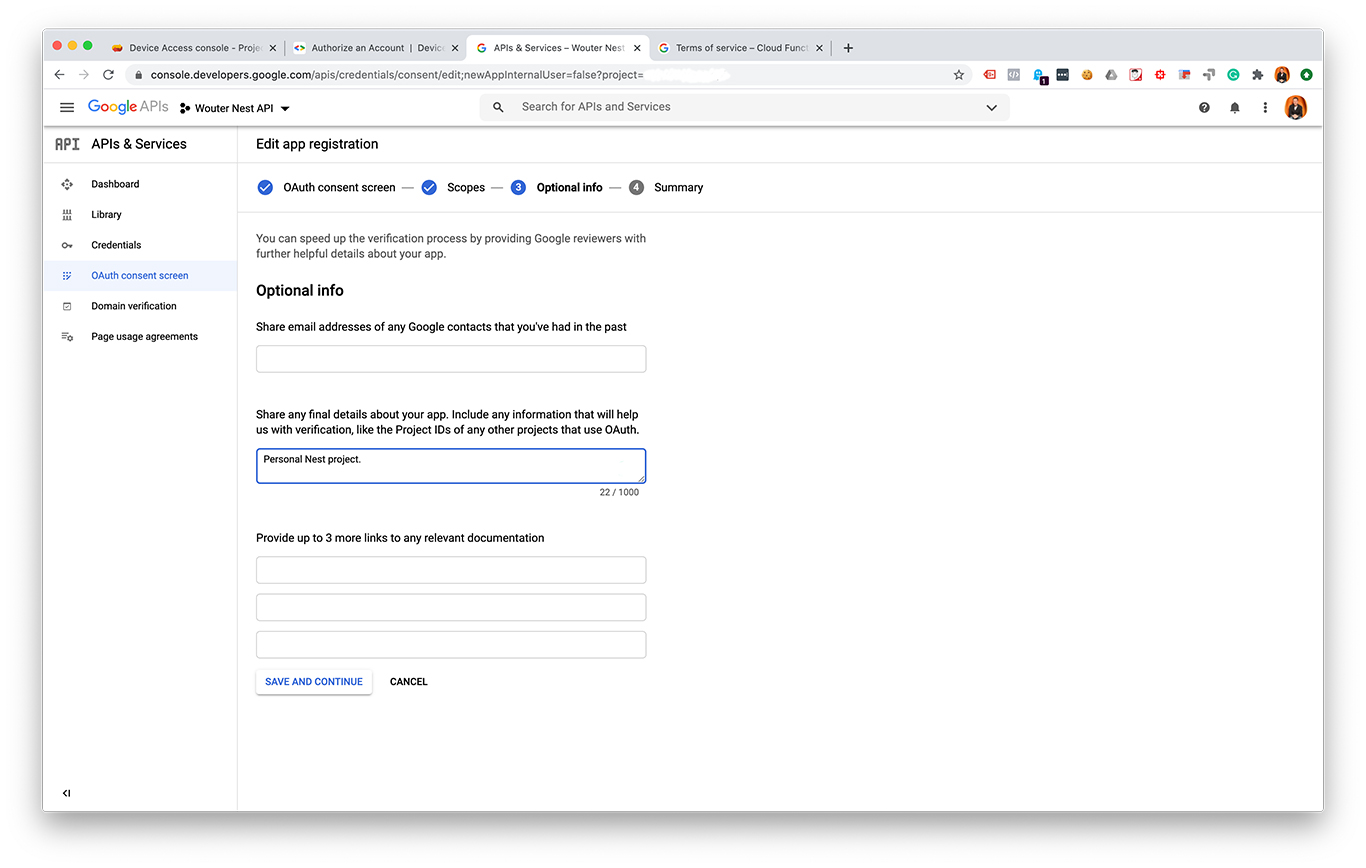
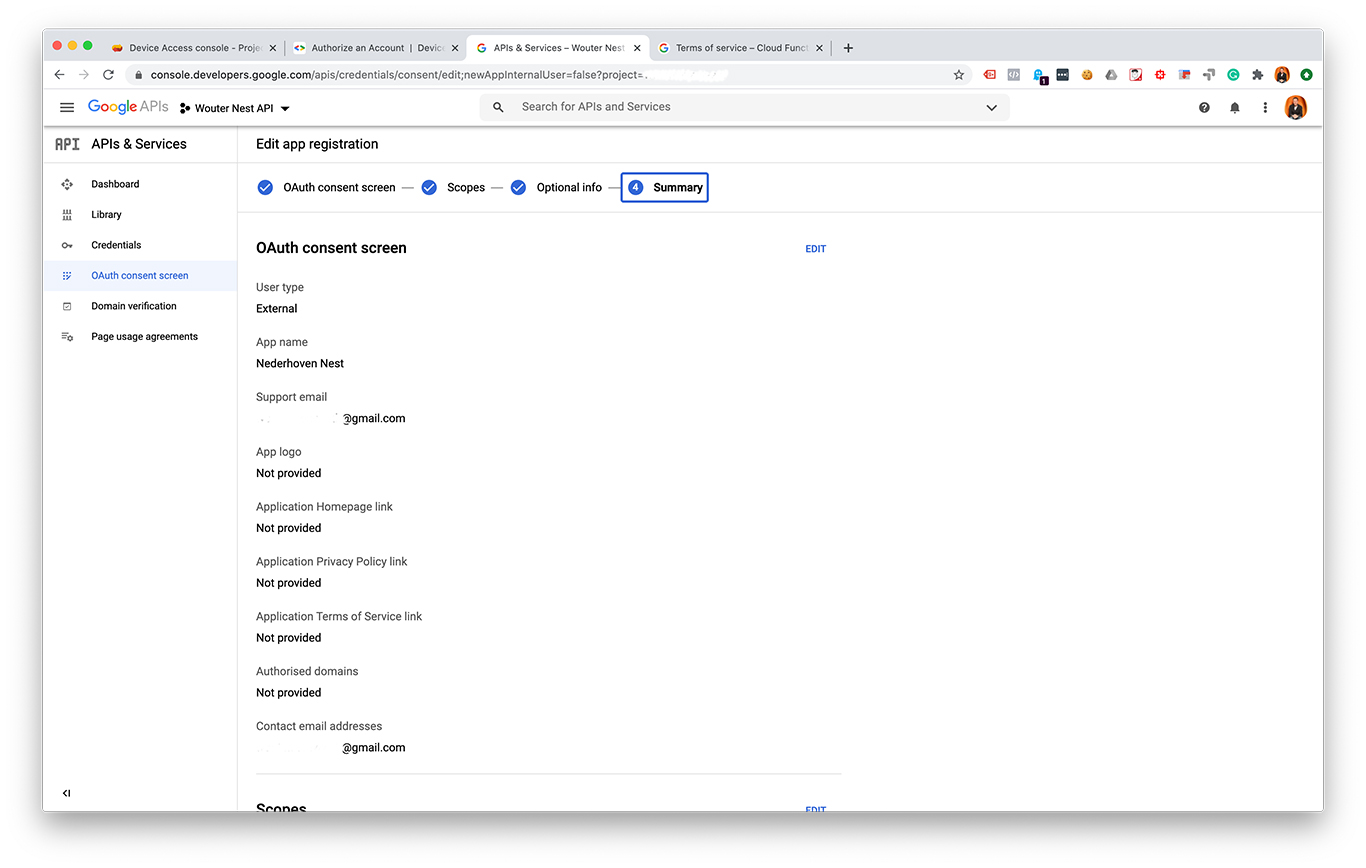
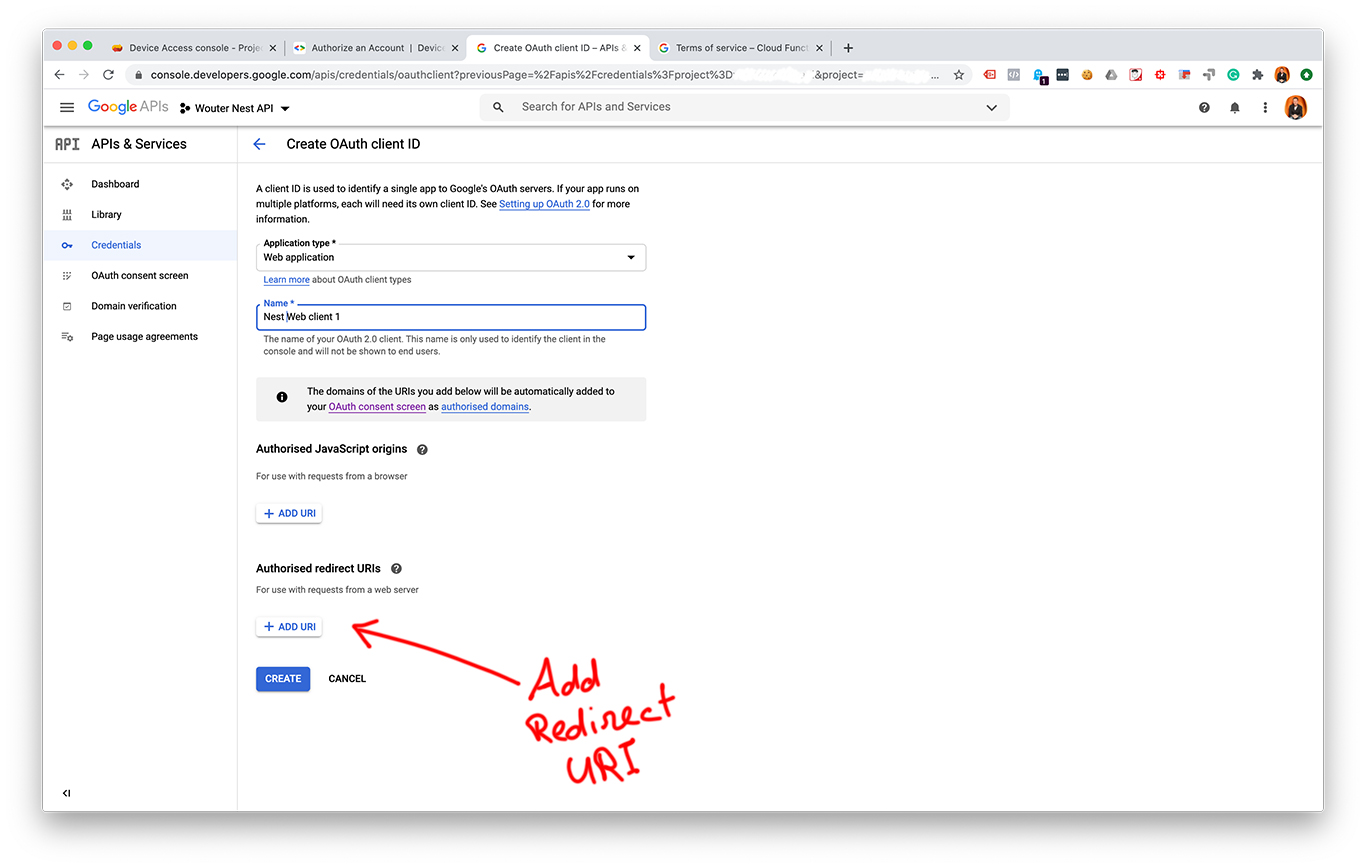
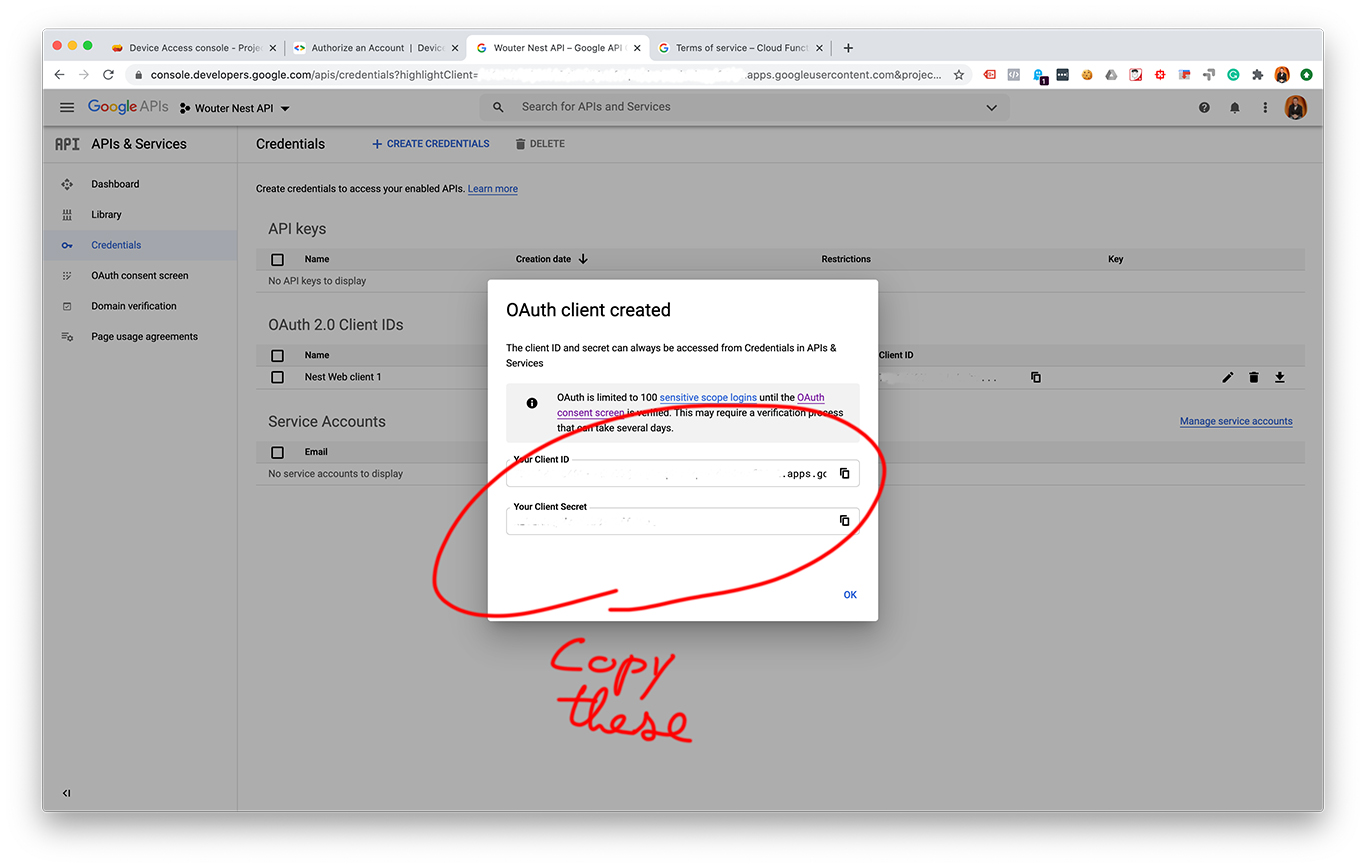

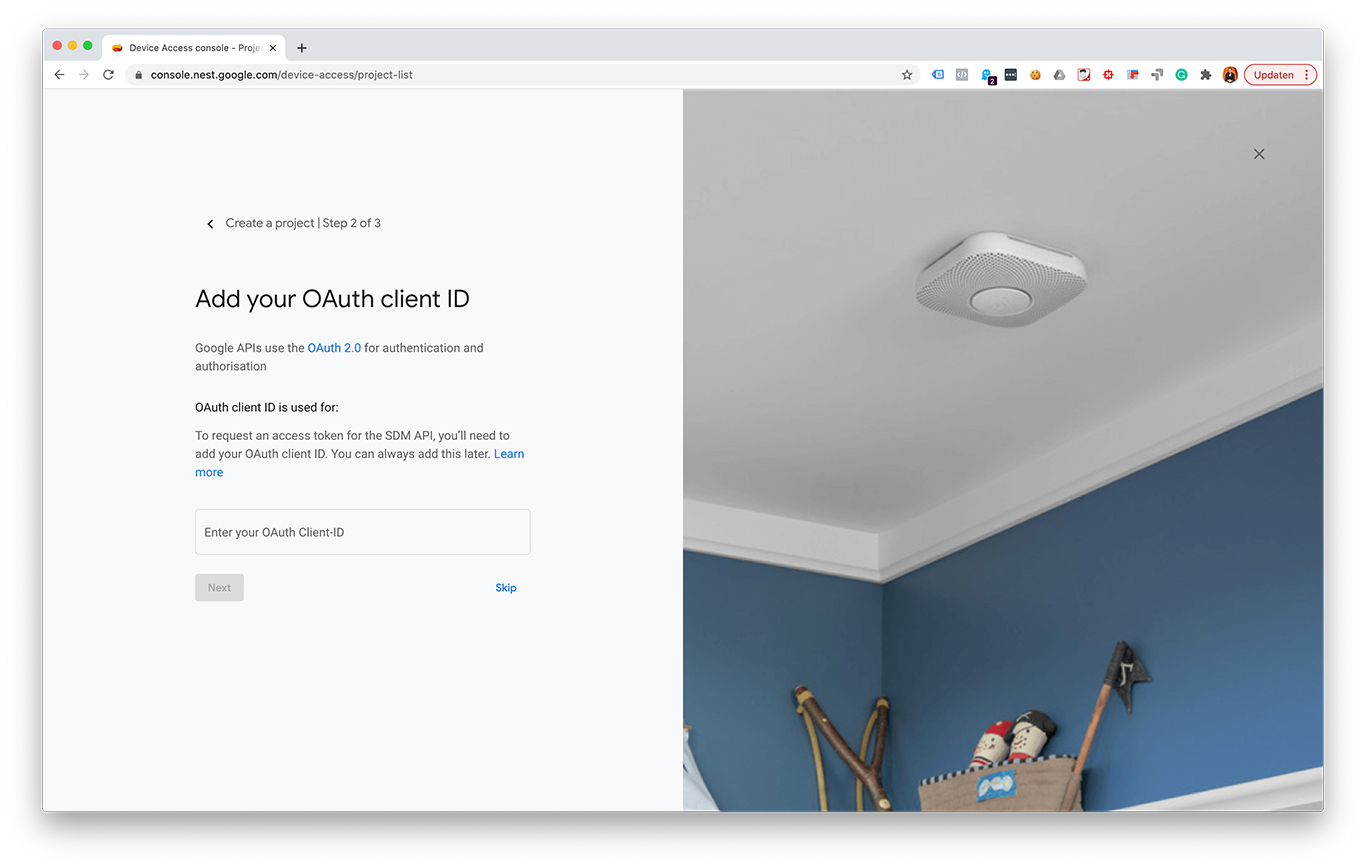

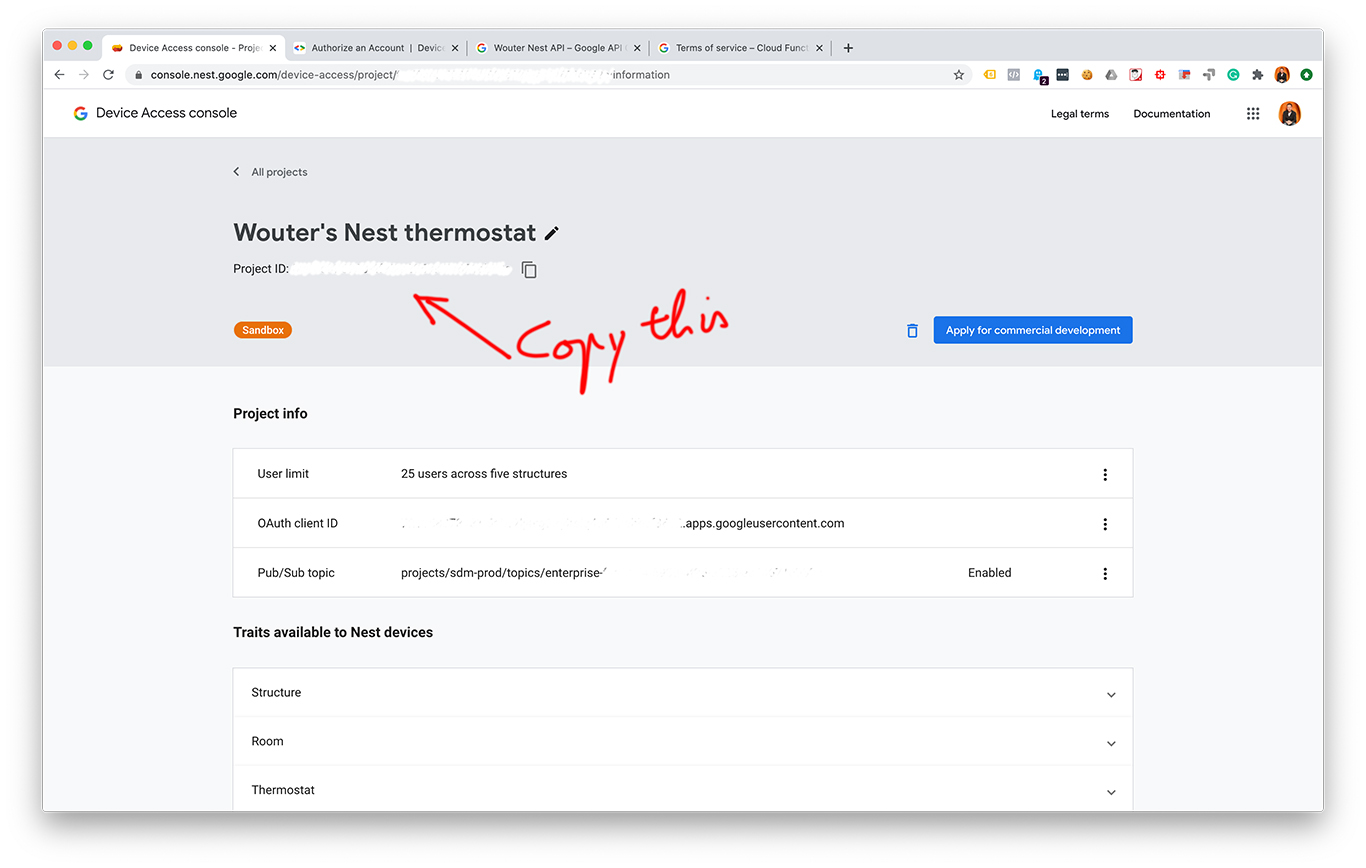
After creating an OAuth 2.0 client ID and a Device Access project you should have these values:
- A project ID. You can find this in your Device Access console.
- A client ID. You can find this with your OAuth credentials.
- A client secret. You can find this with your OAuth credentials.
- A redirect URI. This URI can be almost any URL you want, as long as this URL matches a URI that is entered as an authorized redirect URI in your Cloud Console project.
Some example API calls with Python
Now we can start making API calls! Below is a Jupyter Notebook that walks through all the steps to control a Nest thermostat.
You can also make a copy of the Google Colab notebook I made.
![]()
![]()
project_id = 'your-project-id'
client_id = 'your-client-id.apps.googleusercontent.com'
client_secret = 'your-client-secret'
redirect_uri = 'https://www.google.com'
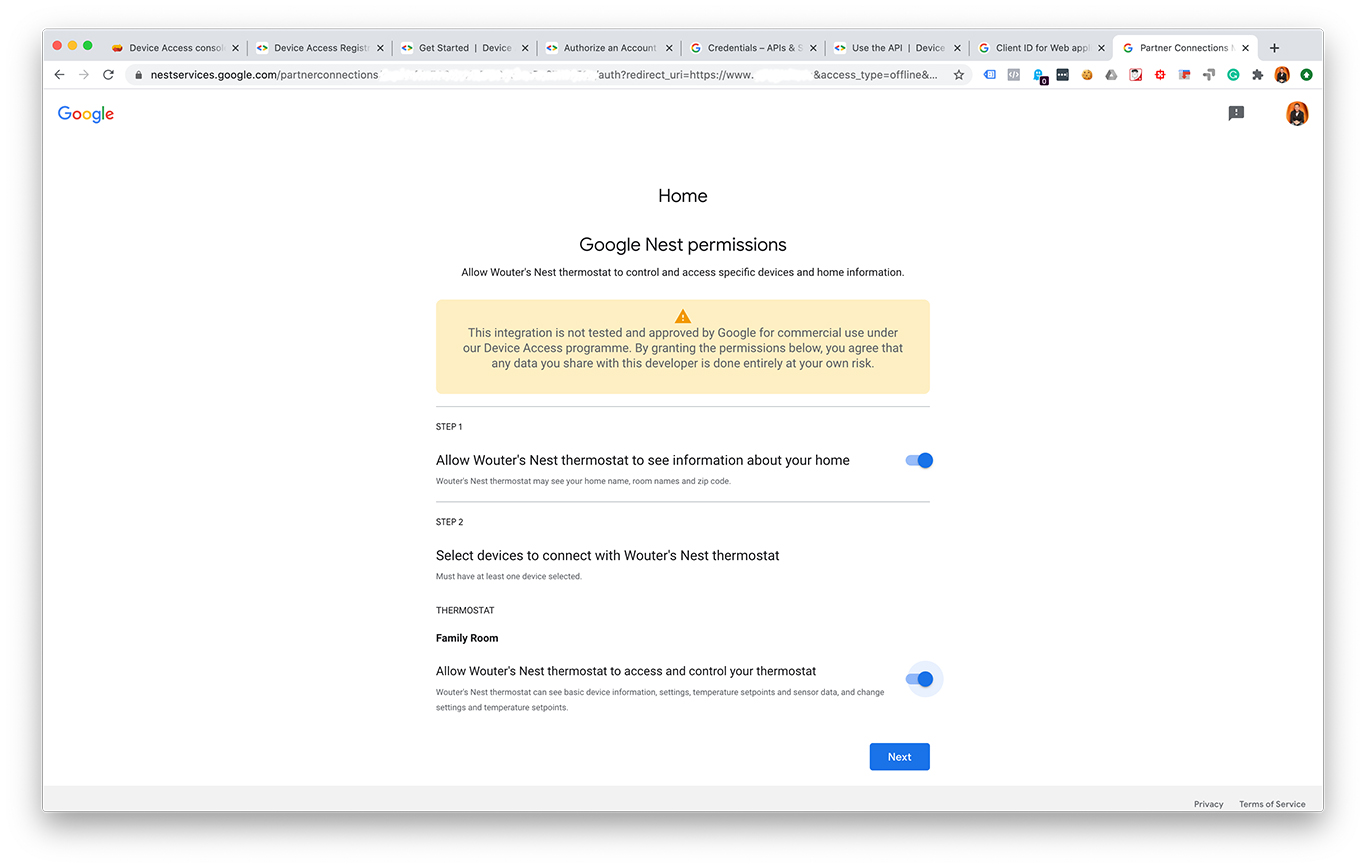
url = 'https://nestservices.google.com/partnerconnections/'+project_id+'/auth?redirect_uri='+redirect_uri+'&access_type=offline&prompt=consent&client_id='+client_id+'&response_type=code&scope=https://www.googleapis.com/auth/sdm.service'
print("Go to this URL to log in:")
print(url)
After logging in you are sent to URL you specified as redirect_url. Google added a query to end that looks like this: ?code=.....&scope=... Copy the part between code= and &scope= and add it below:
code = '4/add-your-code-here'
Get tokens
Now we can use this code to retrieve an access token and a refresh token:
# Get tokens

import requests

params = (
    ('client_id', client_id),
    ('client_secret', client_secret),
    ('code', code),
    ('grant_type', 'authorization_code'),
    ('redirect_uri', redirect_uri),
)

response = requests.post('https://www.googleapis.com/oauth2/v4/token', params=params)

response_json = response.json()
access_token = response_json['token_type'] + ' ' + str(response_json['access_token'])
print('Access token: ' + access_token)
refresh_token = response_json['refresh_token']
print('Refresh token: ' + refresh_token)
Refresh access token
The access token is only valid for 60 minutes. You can use the refresh token to renew it.
# Refresh token

params = (
    ('client_id', client_id),
    ('client_secret', client_secret),
    ('refresh_token', refresh_token),
    ('grant_type', 'refresh_token'),
)

response = requests.post('https://www.googleapis.com/oauth2/v4/token', params=params)

response_json = response.json()
access_token = response_json['token_type'] + ' ' + response_json['access_token']
print('Access token: ' + access_token)
Get structures and devices
Now lets get some information about what devices we have access to and where these are "located". Devices are part of a structure (such as your home). We can get information about the structures we have access to:
# Get structures

url_structures = 'https://smartdevicemanagement.googleapis.com/v1/enterprises/' + project_id + '/structures'

headers = {
    'Content-Type': 'application/json',
    'Authorization': access_token,
}

response = requests.get(url_structures, headers=headers)

print(response.json())
But we can also directly retrieve the devices we have access to:
# Get devices

url_get_devices = 'https://smartdevicemanagement.googleapis.com/v1/enterprises/' + project_id + '/devices'

headers = {
    'Content-Type': 'application/json',
    'Authorization': access_token,
}

response = requests.get(url_get_devices, headers=headers)

print(response.json())

response_json = response.json()
device_0_name = response_json['devices'][0]['name']
print(device_0_name)
Get device stats
For this example I simply took the first item of the array of devices. I assume most people probably have one Nest thermostat anyway.
The name of a device can be used to retrieve data from this device and to send commands to it. Lets get soms stats first:
# Get device stats

url_get_device = 'https://smartdevicemanagement.googleapis.com/v1/' + device_0_name

headers = {
    'Content-Type': 'application/json',
    'Authorization': access_token,
}

response = requests.get(url_get_device, headers=headers)

response_json = response.json()
humidity = response_json['traits']['sdm.devices.traits.Humidity']['ambientHumidityPercent']
print('Humidity:', humidity)
temperature = response_json['traits']['sdm.devices.traits.Temperature']['ambientTemperatureCelsius']
print('Temperature:', temperature)
Set thermostat to HEAT
And last but not least, lets send some commands to our thermostat. The cell below contains the code to set the mode to "HEAT":
# Set mode to "HEAT"

url_set_mode = 'https://smartdevicemanagement.googleapis.com/v1/' + device_0_name + ':executeCommand'

headers = {
    'Content-Type': 'application/json',
    'Authorization': access_token,
}

data = '{ "command" : "sdm.devices.commands.ThermostatMode.SetMode", "params" : { "mode" : "HEAT" } }'

response = requests.post(url_set_mode, headers=headers, data=data)

print(response.json())
Set a new temperature
And finally we can set a temperature by executing this command:
set_temp_to = 21.0
# Set temperature to set_temp_to degrees

url_set_mode = 'https://smartdevicemanagement.googleapis.com/v1/' + device_0_name + ':executeCommand'

headers = {
    'Content-Type': 'application/json',
    'Authorization': access_token,
}

data = '{"command" : "sdm.devices.commands.ThermostatTemperatureSetpoint.SetHeat", "params" : {"heatCelsius" : ' + str(set_temp_to) + '} }'

response = requests.post(url_set_mode, headers=headers, data=data)

print(response.json())
Thank you for this tutorial and example code! I had already read through Google’s documentation before I found this, but I still found your guide helpful. In particular, I was hung up on the point about setting the redirect URI to something that was explicitly configured in the GCP console. An important point is that the OAuth Client ID needs to be requested for a “Web Application” (as seen in your eighth screenshot” to open up the ability to specify a redirect URI. I had been setting this to “Desktop Application” as I planned to run a script on a Raspberry Pi, but through that method you can’t set a redirect URI.
Thanks again!
Hi Brian,
Thanks! It’s great to hear that my screenshots were helpful. And perhaps your addition about the importance of the redirect URI will help others too!
Thanks for the tutorial, really helpful. Unfortunately when I try to execute the first python snippet, once I select the relevant account to log into I get the following error:
No access to partner
Information could not be retrieved. Please contact Nest Thermometer to verify that your account has been properly set up. You may need to add the developer email address as a home member in the Google Home app settings.
I have added that email as a test user in my project, but I can’t figure out where I need to give access. Any ideas?
Hi Kevin,
It looks like the test user does not have access to your ‘Nest Thermometer’ project. If I understand correctly, Google suggests adding the developer address as a home member, which is different from adding the test address to your project.
For my own project, the Nest project, the Google Home app, and all devices are all on the same Google account. I only have one user, which is also the admin, so I don’t have any experience with adding additional users. Perhaps you could try logging in on the thermostat with the same credentials that the project uses?
I hope this helps!
Wouter.
Hi, I just wanted to say this page helped me a lot setting up a raspberry pi touchscreen that controls my smart home. Much appreciated!
Hi Andrew,
Thank you for the kind words! It’s great to hear my blog has been helpful for you.
Wonderful post! Thank you.
When I try to GET devices, using the URL
url_get_devices = ‘https://smartdevicemanagement.googleapis.com/v1/enterprises/’ + project_id + ‘/devices’
I get an empty JSON object back i.e. {}
This _feels_ like an issue on the Device Access Console side, however I re-launched the consent screen i.e. the url in Step 1, and selected an arbitrary other Nest device (I have a bunch) – a camera.
Then I reran the get devices, and now I get a single device back in the array, the camera. I tried everything from the top again with the same result.
So now it seems to be an issue specific to my thermostat, which is a “Nest Learning Thermostat Display (3rd Generation)”
Did you run into anything like this? If not, any ideas? I decided to post this in case someone else runs into the same issue.
Update! I figured this out. I was deep in the Thermostat’s settings on home.nest.com when I noticed the label was blank (Settings -> Thermostat -> About -> Label). I assigned the Thermostat a label and now everything works 🙂
Hi Kobie,
Glad to hear you already found the solution. Perhaps it will help others too!
Fantastic tutorial,
I was just wondering if anyone got around the refresh token expiring every 7 days?
Many thanks,
Craig
Hi Craig,
I just run a script every five minutes to refresh the token so it doesn’t expire. Perhaps that would work for you too?
Hey,
Thanks for the reply.
I did follow your steps to refresh the access token. However, after 7 days I need to essentially re-authorise via Google so that I can get my new ‘1/xxx’ refresh token…
Maybe I am doing something incorrectly ….
If you have time, here is a link to my script.
https://gitlab.com/Manzi1/google-nest-thermostat/-/blob/master/thermostat.py
Many thanks
Craig
Hi Craig,
I had a short look at your code and it looks like you have your client_id, client_secret, and refresh_token all ‘hard coded’ in your script? Every time you’d execute the script, it would use the same tokens, but both the access_token AND the refresh_token should be updated at least once every hour. In the script that is currently running on my RPi, the client_id and client_secret are static, but the access_token and refresh_token are variables that are updated every 5 minutes.
Hope this helps!
Thank you (again), and for your patientiance,
I think I am missing something / going around this completely wrong.
I am able to refresh the ‘access_token’ using the hardcoded ‘refresh_token’, but that stops working after 7 days.
But in order to refresh the ‘refresh_token’ I need to use the ‘code’ that is only valid for one use, so I need to go through the whole Google Nest permissions thing again.
What am I doing wrong ….
Cheers,
Craig
That was a wild ride. Thank you so much!
Even with your help, setting up auth took me 2-3 hours. Once I got that working I got the API call worked out in 2-3 minutes!
I’ve got a call to my PurpleAir sensor and if the AQI is above 50 it turns the Nest fan on for 15 minutes, and the air in the house gets run through the MERV 16 filter.
Hello from 21st century California!
Hi Wouter,
This is a brilliant tutorial. I have been working on it for a few days. Had most of the credentilas working, then i ran on to your website ! Just wondering is there any way to automate the hot water control ?? seems like nothing about the heating water in google api !
Thanks again for a brilliant post.
You’re right. It looks like controls for the water heating are missing. Let’s hope Google will add this later.
Thanks a million for this tutorial Wouter. It helped me a lot when building my Python nest controller CLI app. https://github.com/bastienboutonnet/py-nest-thermostat
It manages tokens and stuff and can also be scheduled as a cron job to pull stats periodically and whatnot.
I build it on my Twitch stream (DataFrittata) so feel free to stop by
Great article. Thanks for posting. Have you seen any way to control the Nest thermostat’s display settings via the API? I don’t see that documented anywhere so far.
Hi Michael,
Thanks! As far as I know, there’s no way to control the display settings on the Nest thermostat.
Fantastic piece of work and straightforward to set up with these instructions.
With regards to the 7-day refresh_token expiry question from Craig above, see:
https://stackoverflow.com/questions/71777420/i-want-to-use-google-api-refresh-tokens-forever
Hence move the project in to “production” rather than leaving it at “test”, but also note that the URI you’ve used has to be an “https:”, not an “http:”, to move the project in to “production”.
I used https://www.google.co.uk/ after my own http: prevented this.
Thanks again!
Thank you so much. Without this guide I would have never been able to figure this out.
Thanks so much for this tutorial! I had been trying to figure out how to do this, since I was forced to change my Nest account over to a Google Nest account, and Google’s documentation is very confusing! Some of the documentation is actually talking about a previous way to do this. I had figured out creating the project, the o-auth id, and then someone else pointed out that in order to set the “redirect uri” AT ALL you MUST make it a Web project. Then, there’s the whole “This o-auth ID can only be used for one project”. It’s really a mess!
I finally just removed all google projects I had tried creating and all smart device projects, then started over carefully following your instructions. It worked first time!
This tutorial is still providing value, thank you so much! Navigating the official docs is almost impossible as the doc writers assume so much. This kind of step by step guide leads the the light bulb moment that we all enjoy when it finally makes sense…
Hi,
I stumbled across this great tutorial. This may be a google thing but there appears to be limited functionality in the API. A couple of things use cases I have that a appear to not be currently supported by the nest are:
I would like to have visibility to the AUX Heat (emergency heat) state. This is the most expensive part on supplemental heating and it would be very important to know
I would also like to see other temperatures in the house. I have sensors installed upstairs and would like to see what those values are and potentially change the control or zone.
Eventually also got it to work. Where I (stupidly) lost most time: I set the redirect URI as you specified to e.g. https://somenonexistigsite/callback. Then I went to the steps to get the URL. From there it eventually wants to redirect to https://somenonexistigsite. This is obviously not possible which I could not figure out for a while.
Only after a few tries realized that the code I need is indeed in that URL and that’s a don’t care the site is non existing as you only need the code which is in that string.
Stupid but who knows I may not be alone 😉